Cheese straws and cheesy olives

Serving suggestion
Serving suggestion... martinis or negronis work well. Sweet drinks, not so much.

Lee, Matt and Ted Lee, While the Bird’s Still Stuffed, But Before the Guests Are, F1, New York Times, Nov. 27, 2002. Did you know your library has old newspapers online – with recipes in them? Handy, huh?

This is actually one recipe with two applications. The brothers Lee wrote up the no-cookie-press-needed cheese straw recipe and I recognized the pastry as quite similar to what my mother used to wrap olives in for hors d’oeuvres. Yes, it was the seventies, what’s it to you? First the Lee’s faux cheese straws:

Cocktail party-to-be
Cheese, butter and flour - it's pretty simple to make tasty savory apps
Double the recipe
I don't clean the food processor for single batches - double the recipe

Since this is just cheesy pastry, it makes sense to do it in the food processor like any other pâte brisée – it’s fast and foolproof. It also means all those fiddly processor bits to clean, so I never do this unless I’m at least doubling the recipe. (If you do more than double, you have to do it in batches – even our new 11 cup processor won’t do more than a double batch well.)

Parts list:

  • 4 oz. extra-sharp Cheddar cheese, grated
  • 4 Tbsp. butter, softened and cut into 4 pieces
  • 3/4 c. flour
  • 1/2 tsp. salt
  • 1 tsp. crushed red pepper (this is the right amount, but reduce if you don’t like even a little heat)
  • 1 Tbsp. half-and-half

Grate the cheese in the processor, switch to the steel blade, then pulse cheese, butter, flour, salt and red pepper until you’ve got clumpy sand or coarse crumbs. Add the half-and-half (or milk or cream), and process until dough forms a ball – it should only take a few seconds, depending on temperature and moisture in your cheese.

I think a rest/chill for 15 minutes or half an hour is helpful at this point, but it’s up to you. The Lees’ say one recipe makes a rectangle 8 by 10 inches and 1/8 inch thick. To make the straws, cut dough into thin strips, 1/4 to 1/3 inch wide. Gently transfer each ”straw” to an ungreased cookie sheet, leaving a 1/4-inch space between them, and bake 17 minutes, or until the ends are barely browned. Let cool.

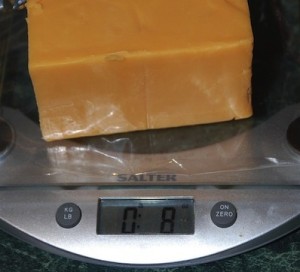
If you’re doubling the Lee’s recipe to use 8 oz., you can probably buy a block in just that size at the store. Otherwise, it’s handy to have a scale. We buy the plain sharp cheddar in the giant two pound blocks and cut it up.

Cheese straws in the making
Cheese straws in the making - pizza cutter or paring knife makes short work of the pastry.

You can use a pizza cutter or a fancy pastry cutter, though I usually just use a paring knife – dip it in some flour if it sticks. If you have a roulpat, do be extra careful not to cut it when cutting your pastry – it would be best to move your rolled dough to another surface to cut (but I live dangerously).

Cheese "straws"
Cheese "straws" without the cookie press.

Once baked off, the straws cool quickly and remain crisp for a few days, but they’re best warm. I’d suggest keeping some dough in the fridge and baking them when folks drop by so they’re fresh and warm. Unless you don’t want to encourage that sort of behavior.

Now, about that part that I added… the olives. People will have strong feelings about these, one way or the other. Either they’ll love them and pester you for them on a regular basis, or… not. I live with an anti-olive person. That’s fine… more for me.

Cheesey olives
Cheesy olives are spicy, cheesy, salty - and freeze wonderfully. You have no excuse not to have an impromptu cocktail party.
Any olive will do
Any olive will do - jalapeño, pimento or peppered.

Cheesy Olives is a nice additional use of the cheese pastry. Just roll it out and cut into squares or triangles to wrap around the olives of your choice. The only trick it to make sure that your olives are really well drained. I drain in a colander then press them gently in a paper towel.

Once you have the olives wrapped in the pastry and put on a baking sheet, they can be frozen. Once frozen on the sheet, put them in resealable freezer bags and store for a spur of the moment party.

To bake, just put on a small pice of foil (no dishes!) and pop in the oven or toaster oven for about 15 minutes (the “everything bakes at 350F and burns at 450F” rule holds here). If you’re doing a real batch – not just for yourself – a little butter on the foil or the cookie sheet will surely keep them from sticking, but it’s usually not a problem for me. The worst that happens is you get a little tear in the crust. Smaller olives might bake faster – once the pastry is set and starts to brown a tiny bit, they’re done.

Oh, and these will be about 10,000,000F internal temperature when they come out of the oven. Give them five minutes at least. You’ve been warned.

Almond Cake

For those of us too chicken to try Steph’s macarons, this will get you your almond fix. As a bonus, it’s very, very easy and is always a crowd pleaser.

Almond Cake

This was in the food section of the The Week in November 25, 2005 as a summary of an LA Times article about Lindsey Remolif Shere’s Chez Panisse Desserts cookbook. How’s that for attribution? It does indicate, however, why this may seem familiar: it’s not a new recipe. In fact, looking at the original now, I see that this is officially dubbed “Almond Torte” but we’ve been calling it almond cake for so long, I’m changing the title.

Parts list:

  • 1 1/4 c. sugar
  • 8 oz. almond paste
  • 1 c. unsalted butter, softened
  • 1 tsp. vanilla extract
  • 6 eggs at room temperature
  • 1 c. flour
  • 1 1/2 tsp. baking powder
  • 1/4 tsp. table salt
  • 9-inch cake pan or springform pan

Almond pasteHey! Almond paste isn’t the same thing as marzipan. Nor is it the same as ground up almonds. You’ll probably see some paste that comes in a 7 oz. package. Note that you need 8 0z., and there is a manufacturer that puts 8 oz. of almond paste in a can (UPDATE: now a box). We’ve used both, and really, you need all 8 oz. or it messes with the fat ratio in the cake. Just sayin’.

Mix the almond paste and the sugar in your mixer or food processor. You want sandy looking almond-sugar without lumps of almond paste. Start slow – when we do this in the mixer, it invariably tries to throw some of the sugar and almond paste out of the bowl – just pick up any big lumps and chuck ’em back in the bowl.

Almond Cake creamed butter, sugar and almond paste
Cream the butter, sugar and almond paste until it’s white and fluffy.

Cream the butter and almond-sugar mixture. Watch the color during this step; you want it to go from yellowy-tan to almost white. This is your only real chance to get any air into the cake, so don’t skimp here.

Add the vanilla and the room temperature eggs one at a time, allowing each to become fully incorporated before adding the next. (I break them into a measuring cup to check them and then pour them in one at a time.)

Combine the flour, salt and baking powder and add to the batter and mix until just combined.

Butter and flour (or Baker’s Joy and/or parchment round) a 9″ round x 3″ deep cake pan or a springform pan (We’ve only used the springform a few times – there’s really no need and it’s a pain to clean). Pour/spread in the batter (depending on your room temperature, you may need to even it out a little in the pan) and bake in a 325F oven for an hour to 75 minutes.

Almond Cake cooling
As the cake cools, it will sink a bit in the center and pull from the edges of the pan.

Skimping on baking time is the one thing you can do to mess up this cake. It will look beautiful and puffy and golden brown after about 50 minutes. It’s lying to you! Don’t believe it. It’s all a trick. If you take it out now, the center will sink and you will be sad. (It will still taste fine, but it won’t look so nice – can you tell we’ve done this a few times?) Test with a toothpick in the center and look for the center to spring back when pressed lightly. Don’t test halfway between the edge and the center – test in the center. (UPDATE: if your kitchen is particularly warm, you might even consider popping the filled pan into the fridge to firm up the butter for 5 or 10 minutes. This will give the batter a chance to set up a bit in the oven before the butter loses all its structural integrity.)

Let the cake cool for about an hour or so – it will pull away from the edges a bit. Run a knife around the edge and unmold if you springformed, or dump it out onto a cooling rack if you used the regular pan. If you let it cool overnight in a cold kitchen and it seems reluctant to leave the pan, put the pan in a hot water bath for a few minutes to soften the butter you greased the pan with – it will pop right out (don’t do this with a springform – they’re notoriously leaky and no one wants soggy cake).

Almond cake all dressed up
All dressed up… for me to eat!

A sprinkle of powdered sugar and a few slivered almonds (toasted if you’re feeling fancy) make it look really nice. We usually don’t bother unless we’re taking it to a party. (The almond garnish is a nice warning to the nut-intolerant as well, since the cake doesn’t really look like it’s full of nuts.)